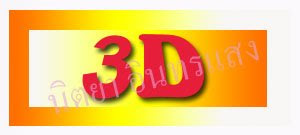

2.เลือกเครื่องมือ rectangular tool แดรกเมาส์ตีกรอบสี่เหลี่ยม

3.เลือกเครื่องมือ Gradient tool เลือกลายละเอียดแล้วไล่เฉดสีเหลืองเข้มไปหาสีเขียว จะปรากฎดังภาพ

4.ย่อเส้นปะเข้ามาอีก 10 จุดโดยไปที่เมนู Selecl- Modifiy-Contract ใส่ตัวเลข 10 pixels แล้วกดปุ่ม ok

5.แดรกเมาส์จากด้านขวามาด้านซ้ายก็จะปรากฎดังภาพข้างล่าง

6.ไปที่เครื่องมือ type tool เลือกสีฟรอน์สีแดงแล้วมาคลิกที่ปุ่มเพื่อพิมข้อความ 3D ย้ายข้อความมาไว้ตรงกลางโดยใช้ชนิดอักษร Arial Back ขนาด 79 pt และเลือกสีเป็นสีแดงจะปรากฎดังภาพข้างล่าง

7.ไปที่เมนู layer-typc Convert to shape จะปรากฎกล่องรอบข้อความจากนั้นไปที่เมนู Edit-Transform-Perspectivc เปลี่ยนรูปทรงตามที่ต้องการแล้วกดปุ่ม Enter เมื่อได้ภาพที่ต้องการ

8.ทำอักษรให้นูนโดยไปที่ layer-style-Bavel and Emboss จากนั้นจะปรากฎลายละเอียดต่างๆและเลือกสีที่ต้องการ

9.เลือกเสร็จกดปุ่ม ok จะปรากฏดังภาพข้างล่าง


ไม่มีความคิดเห็น:
แสดงความคิดเห็น